
Brewing beer at home is easy. If you can make mac and cheese from a box without help, you can make beer.
NOTE: This is a basic overview for brewing an extract beer recipe. Click here to learn about all-grain brewing.
THE 4 BASIC STEPS:

“Without question, the greatest invention in the history of mankind is beer. Oh, I grant you that the wheel was also a fine invention, but the wheel does not go nearly as well with pizza.”
The art of brewing is as old as civilization. Between 10,000 and 15,000 years ago, some humans discontinued their nomadic hunting and gathering lifestyle and settled down to farm. Grain was the first domesticated crop that started the farming process, and this made beer possible.
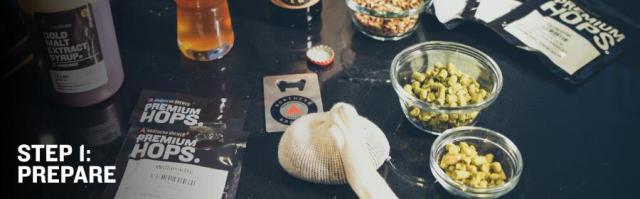
But like all good things, preparation is the key to success. How you prepare your equipment and ingredients will determine the outcome of your first home brew.
But enough talking now, let’s get down to business.
1. Gather your brewing equipment. You’ll need:
- Brewing Kettle
- Fermenter + Air Lock
- Funnel (optional)
- Sanitizer
- Auto-Siphon
- Stir Spoon
- Beer Recipe Kit (or individual ingredients)
If gathering all of that sounds like too much work, simply choose one of Northern Brewer’s beer making kit that have everything you need to brew beer, all in one box.
2. Sanitize, Sanitize, Sanitize. Your success will rely on how clean your equipment is. Anything that comes in contact with your beer after the boil process should be sanitized. PBW and Star San are great cleaners and sanitisers.
Read more about preparing to brew.

1. Steep Grains. Fill your 19 litres brew kettle with 8 litres of water. As you heat your water, steep your grains for 20 minutes, or until your water reaches 77 C degrees. When you remove your grains, let the water drip out of the grain bag and into the kettle. Don’t squeeze your grain bag as you don’t want to extract tannins, which may give your beer unwanted flavours.
2. Bring kettle to a boil – Once your kettle comes to a rolling boil remove it from heat and add malt extracts. Once the extract is dissolved return to a boil. Hops will now be added at various intervals. (Note: Be careful not to boil over when hops are added.) Refer to your exact recipe as to when you need to add hops to your boil.
3. You now have wort – Otherwise known as sugar water. Cool your wort as quickly as possible. This can be done one of two ways:
- Ice Bath – Simply set your pot into a sink filled with ice water.
- Use a wort chiller – Insert chiller into your wort. Run cold water from your tap through the chiller and out to the sink. A wort chiller is the most effective way, but either will get you the desired results.

Step 3: Ferment
Don’t forget to sanitize all your supplies! Then…
1. Pour cooled wort into the fermenter. Some brew kettles even have a valve for easy transportation from your kettle to your fermenter.
2. Add water to bring the level to 8 litres.
3. Aerate wort by splashing it around in its container. Yeast needs oxygen and splashing your wort will help.
4. Add yeast. Dry yeast is the easiest, as you don’t have to prepare it beforehand. Sanitize the yeast pack + scissors, cut the corner off the yeast pack, and pour the yeast into the fermenter.
5. Seal your fermenter, add a fermentation air lock, and store in a dark cool place. Ales should stay at 20c degrees to ferment properly.
Read more about Beer Fermentation.
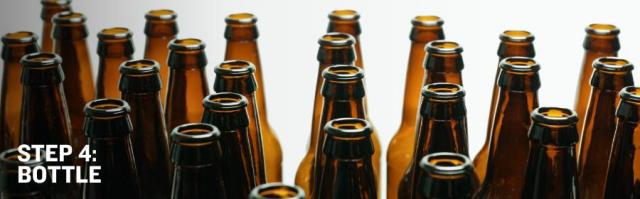
Step 4: Bottling
After fermentation is complete, typically within two weeks, it’s time to bottle your beer.
1. Cleanse everything: bottles, bottle filler, bottle caps, bottling bucket, and any transfer hoses used. Use a bottle brush on your bottles.
2. Boil your priming sugar in 470ml of water. After it cools, add it directly to the bottling bucket.
3. Transfer your beer. Siphon the beer out of your fermenter and into your bottling bucket. Leave as much sediment in the fermenter as possible.
4. Fill the bottles. Attach bottle filler to hose, and hose to bottling bucket spigot. Open the bottling bucket spigot and push the bottle filler to the bottom of the bottle.
NOTE: Fill each bottle right to the top. When you remove the bottle filler, it will leave the perfect amount of space at the top of the bottle.
5. Cap the bottles with caps and a bottle capper.
6. Store the bottles at room temperature for roughly two weeks. This gives your beer time to carbonate.
Read more about How To Bottle Homebrew.

You did it. You made beer. All that’s left to do is.
1. Refrigerate.
2. Enjoy.
Still feeling uncomfortable, take a look at this simple step by step youtube presentation.
Happy brewing.


